Showing posts with label Christmas. Show all posts

Thursday, December 27, 2012

Christmas 2012 Rewind

I hope everyone had a wonderful Christmas! Ours was lovely. We had the extended family over for dinner on Christmas Eve (it's my favorite time, because that's when the nieces & nephews open their gifts- and Christmas really is more fun with little kids!)


Dessert is very important! The cake in the lower left corner is Pear Spice Cake, with Ginger Cream Sauce in the pitcher. Both recipes are in my Fruitful Hands book- it is a favorite of ours at Christmastime! Every time I make it... I can't believe how good it is :)

On Christmas day, we went to visit our daughter Samantha and her husband Jeff, who hosted their first Christmas gathering in their new apartment. Then we came home and relaxed and enjoyed some of our Christmas gifts (watched some DVD movies and read our newest books.)

The day after Christmas, we were out early- I had to get all of my wrapping paper at 50% off for next year! (I almost ran out this year- don't want that to happen next year!) I also had to visit the calendar store at the mall and get my calendars for half off, also. I have collected calendars for about 15 years because I love the artwork. I still like to pull out my piles of calendars from the 1990's on occasion just so I can enjoy a cup of tea and flip through them, admiring the artwork.


On the 26th, we also did something I had been looking forward to for a while- we went to see the new Les Miserables movie..... it did not disappoint! So many times during the movie I had goosebumps, and I cried at the end.... I have been a huge fan of the stage show and soundtrack for many years (in fact, my daughter and I will be going to see the stage production in Philadelphia next month.)


I love this story of redemption- how Jean Valjean, one of the most noble literary characters of all time, turns away from hate, bitterness and hopelessness because of the kindness and mercy shown to him by one man, the Bishop. He learns to love unselfishly while raising his adopted daughter, Cosette. It is an epic story with heroism & battles, friendship, love at first sight, unrequited love, and comic relief provided by the Innkeeper and his wife.....
(And, I have to say- If Hugh Jackman & Anne Hathaway do not win Oscars, I will be very grumpy!)


We have had fun just hanging out and relaxing this week.... the kids have been baking in the kitchen, trying out some new recipes from their new cookbooks.... things got silly....


We will be taking a little time off from the blog over the next couple of weeks. In the meantime, I will be putting up some "Throwback Posts," highlighting some of my favorite posts from the past that you might have missed.

To all of my wonderful readers & friends, I hope you had a wonderful Christmas. And for those of you who find this time of year difficult and sad, please know that I am sending (((hugs))) your way.....


Tuesday, December 25, 2012


Today in the town of David a Savior has been born to you; he is the Messiah, the Lord. This will be a sign to you: You will find a baby wrapped in cloths and lying in a manger.”
Suddenly a great company of the heavenly host appeared with the angel, praising God and saying,
“Glory to God in the highest heaven,
    and on earth peace to those on whom his favor rests.”

Luke 2:11-14


Wishing you Joy & Peace on this Christmas Day!

Monday, December 24, 2012

This Week's Ornament Tutorial : Fabric Scrap Rosettes


So it's Christmas Eve and you think you don't have time to make an ornament? Wrong! These are pretty quick.... And it's a great scrap project- You know those long skinny scraps left over after you trim the excess backing from your quilt? Perfect! Fat quarters are also perfect for this project. (Oh, and Jelly Rolls will work too, even though they're 2 1/2" wide instead of 3"). You can even use up your scraps of fusible webbing.

If there's no time to make them for Christmas, you could make them in any fabrics and hang them in your window, or attach to gifts as an embellishment. Make Blue & White ones to mimic snowflakes for January, or try Red & Pink fabrics for adorable Valentine's Day decorating.

You will need:
Scraps of fabric
Fusible Webbing
Needle and Thread
Button
Glue
Thread or Cord for hanging

To make the ornament, cut 2 strips of fabric about 3 x 19".


Cut fusible webbing so that it is slightly smaller than fabric strip and fuse, according to manufacturer's directions, to WRONG SIDE of one fabric strip. (You can piece together scraps of the fusible webbing, as I did.)

Remove paper backing and fuse the other strip of fabric to the one with the fusible webbing, RIGHT SIDES OUT.

Trim the strip to 2 x 18".
Accordion fold the strip, pressing the creases with your fingers as you go. The creases will stay in the strip, so when the folded piece of fabric becomes too bulky to hold, you can release it and go on to the next section.


Run a needle and thread through all of the pleats except for the first and last ones. Pull thread so it is snug and tie the thread off.

Sew the edges together. Use matching thread (I used contrasting thread so you could see it better in the photo.)

Attach thread or cord to make a hanging loop.

To make the yo-yo for the center, cut a circle that is 4" in diameter. Make a running stitch all the way around, about 1/8" from the edge. (No need to turn the raw edge under, it will be hidden by the button.)

Pull thread to gather and tie off.

Sew a button to the yo-yo. Glue the yo-yo to the ornament.

If you would like a double-sided ornament, simply glue another yo-yo and button to the back.


Click here for PDF of this tutorial.


This is our third ornament tutorial for the month of December. If you would like to see previous tutorials, see below (click on title to see tutorial):


Patchwork Bird


Glittered Forest Friends


Friday, December 21, 2012

Orange Cranberry Shortbread Recipe

Christmas is so close, and there are still plenty of goodies in our house! These shortbread cookies were crispy, buttery, and delightful.... Guest blogger shares the recipe with us today...


Remember that time I fell really hard in love with cranberry and chocolate?  Well, the affair hasn't stopped, and now I've brought orange into the equation.  I mean, just take a look at these yummies.  These cookies include everything I dream about for the holiday season.  Except sugar plums. They remain dancing in my head.


The best part about these cookies is the fact that they are shortbread.  Shortbread, with all it's simplicity, is the perfect companion to any holiday gathering.  They don't steal the show like a cake, don't have a reputation of a pumpkin pie, but oh my are they magnificent with coffee or tea. When I did my study abroad in England, my favorite thing to do at night was to sit at the kitchen table with a cuppa tea and a package of shortbread cookies.

Here's what you'll need:
1 cup plus 2 tbs butter, softened
1 cup sugar
2 cups flour
1 cup cornstarch
1 tsp orange extract
3/4 cup Craisins (dried cranberries)
1/2 cup semi-sweet chocolate chips

1. Beat together butter and sugar, until light and fluffy.  Add in flour, cornstarch and orange extract; mix until combined. Add in craisins, and mix into dough.  The dough will be a little dry and powdery.
2. Make dough into a ball and wrap in plastic wrap.  Refrigerate for 20 minutes.  Preheat oven to 325 degrees.
3. Roll dough out onto a powdered surface.  The thickness of the dough should be about 1/4 inch. Cut out rounds or other simple shapes and place on a baking sheet with parchment paper.  Bake for 20 minutes, or until edges are slightly golden. Wait until fully cool to top with chocolate.
4. Melt chocolate chips at 30 second increments in a glass bowl in microwave, stirring in between.  When fully melted, drizzle chocolate over cookies.

Makes about 36 cookies.


 Enjoy!

Happy weekend!
Samantha


Monday, December 10, 2012

This Week's Ornament Tutorial : Patchwork Bird AND Pat Sloan's American Patchwork & Quilting Radio Show

(Wow! that was like, the longest blog post title in history, right?)


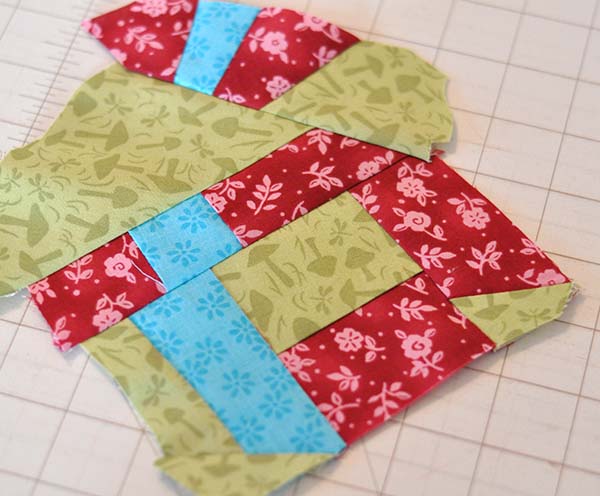
For the month of December, we will be doing a tutorial for an ornament every week. This week's ornament is a patchwork bird. It's an excellent way to make use of your scraps! If you have bags full of tiny pieces that you've been saving for someday- today is your day!

If you are short on time, there is also a plain version- you can sew up a "flock" of these in an afternoon.... You could also add lavender or a few drops of scented oil to your stuffing to make sachets. I've done "modern Christmas" colors of bright green, fuchsia  and turquoise- you can use whatever fabric scraps you have lying around (I know you've got some fabric there, somewhere... ha ha)

Supplies:
  • Scraps of fabric
  • Polyester filling/stuffing
  • 1/8" ribbon
  • Embroidery floss
  • For the eye: a tiny button, seed bead, or thread (such as embroidery thread or wool thread) to make a French knot
Print out and cut out pattern pieces (link at bottom of post).
To make the patchwork version, piece together scraps of fabric until you get a piece about 5 x 9” big.


For the bird's body: For the patchwork version, place you patchwork piece right sides together with a plain piece of fabric. For the plain bird, place 2 pieces of fabric right sides together, pin pattern to fabric. Cut out around pattern. Remove pattern piece. Pin fabric pieces together.

Sew the pieces together (still right sides together) with a 1/4" seam allowance, leaving an opening as indicated on pattern piece. Backstitch at beginning and ending of stitching.


Hint for sewing around curves- shorten your stitch length, and as you go around the curves, go slowly and stop every few stitches to lift the foot just slightly and pivot the fabric slightly.

Clip seam allowance at points of tail and beak. Make a few small notches at the curves. This will eliminate some "bulk" of the fabric and make your seams flatter when you turn it right side out.


Turn bird right side out. You can use tweezers to help pull tight areas right side out. Use a wooden skewer to gently push out the points of tail and beak. Press (press the raw edges of the opening in.)


Loosely stuff bird with polyester filling. Use a wooden skewer to push filling into head and tail. Hint: stuff bird with many small pieces of filling, instead of a few large pieces.

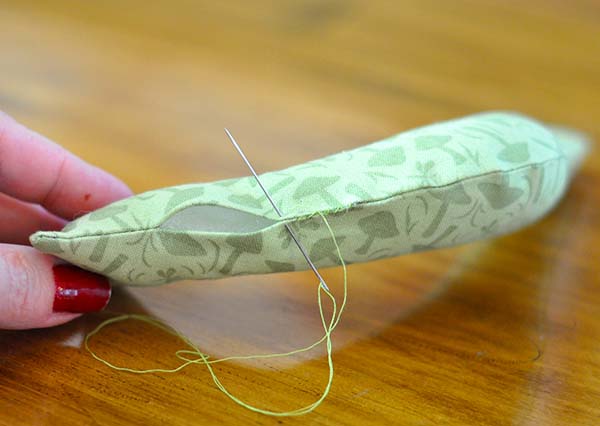
Hand stitch opening closed with matching thread. 


For wing, place 2 pieces of fabric right sides together, pin pattern to fabric and cut out. Remove pattern piece. Sew together (do not leave an opening.) Trim seam allowances.


Carefully cut a slit about 1 1/4" long into 1 side of the wing.
Turn right side out; press. Stitch opening closed and/or put a few drops of Fray Check on the raw edges. 


Use embroidery floss to stitch around edges of wing- you can do a blanket stitch, whip stitch, or make an X stitch. To make the X stitch, bring up needle through A, bring it around to the back, then bring it up through B (to the right of A). Continue making X’s.


Use matching thread to stitch wing to bird (you don’t have to stitch down the whole wing, just the top.) 


For the eye, sew on a tiny button, seed bead, or make a French knot.

Tie a bow around the neck with 1/8" wide ribbon.

Use a sewing needle to attach a 12" piece of embroidery thread to top of bird; knot to form a loop for hanging. 

  
(Here is the link to last week's ornament, Glittered Forest Friends, in case you missed it.)


What colors would you make your birds in? I think this would be a really cute project any time of year, not just during the holidays.

Oh! and don't forget I will be on Pat Sloan's American Patchwork & Quilting Show later today! I am excited, and pretty nervous- I hope I don't say anything stupid, you know??? I mean, it's one thing to say something stupid to the bank teller or the store clerk, but with so many people listening on the interwebs..... it's a bit nerve wracking!


Friday, December 7, 2012

Merry Moss: A DIY Christmas Decoration

Guest blogger Samantha has come up with an easy project for your home! I love this idea, it will add "rustic elegance" to your home. At the end of the post, I will have an announcement...


Happy December!
While I am sad to leave Fall behind, I am looking forward to the Christmas season.  It's my first Christmas as a married person (!!!!) so it's extra special for me this year.  To get myself into the spirit, I've been listening to Christmas music, doing lots of baking, and of course, making decorations!
My first decoration is actually something I've been wanting to make for a while as a permanent "non-holiday" decor item.  But once I had the Christmas music on, I was like, "Aw yeah, Christmas. Here we go."
Want to make your own? It's surprisingly simple and endlessly customizable!

Here's what you'll need:
wire, about 18 gauge (it needs to be easily bendable, but hold its shape when you add the moss)
fake moss (available in floral department of craft store)
clear fishing line
needle nose pliers

1. Form the wire into whatever word you would like it to say.  If you get it perfect, it might help to take a picture for yourself to refer back to, since you'll be bending the wire a little bit to attach the moss.
2. Cut a piece of fishing line about 18" long and tie it to the end of the word wire with a square knot. Take your first, small piece of moss and hold it against the wire. Carefully begin wrapping the wire around the moss in a spiral motion to hold it to the wire.  It should look like this:


3. Continue adding on more pieces of moss to be wrapped to the wire until your fishing line runs out.  Give yourself a little bit of extra line so that you can tie it off.  Once you have tied and clipped the fishing line, tie on another piece and continue wrapping the moss to the wire until the whole word is covered.

As I said, you could make this moss word say anything; "Christmas," "joy," "welcome," or even the name of your family.


I hope this project has gotten your holiday gears in motion, and that this rustic and whimsical decoration brings warmth into your home!

Happy weekend!
Samantha

So here is my (Jacquelynne's) announcement- in case you haven't heard yet, I will be on Pat Sloan's American Patchwork & Quilting radio show this coming Monday, December 10! Please join me- I'm sure it's going to be a lot of fun! (Can you from all of my !!!!! that I'm excited???!!!) Please tune in and tell all of your quilt-y, craft-y, sew-y friends about it.....


This weekend we are going Christmas caroling, and I'm going to try to finish putting all of my decorations up. And then, maybe some much needed down time and relaxation on Sunday afternoon. What's going on with you this weekend? Holiday decorating? Baking Christmas cookies? Maybe just catching up on laundry and other domestic necessities?? Remember to take time to do something fun....

Wednesday, December 5, 2012

This Week's Ornament Tutorial: Glittered Forest Friends


I do love my glitter. I love hedgehogs. So when I was trying to think up some ideas for ornaments, of course Glittered Hedgehogs came to mind. Why not? And I didn't want Hedgehog to be lonely, so I made him an Owl friend....

The trickiest part of this project is trying not to lose your glitter by handling too much... Handle the cardstock pieces as little as possible, and always on the edges.


Supplies:

  • White cardstock
  • 2 pieces of wood, 1/8 - 1/4" thick (such as Balsa wood), cut to 3 1/2 x 4" (for mine, I actually used some scraps of beadboard that my husband had laying on his workbench)
  • Acrylic paint in Brown (Americana Burnt Umber) and Light Green (Delta Ceramcoat Leaf Green)
  • Glitter- Brown and Light Green (Martha Stewart Brownstone and Green Agate)
  • ModPodge decopauge glue for paper
  • Scrap paper
  • X-acto knife and/or sharp small scissors
  • Small old paintbrush for applying ModPodge
  • 1/8 - 3/8" drill bit
  • #240 sandpaper
  • String or cord for hanging
  • Optional: 1/8" hole punch

Print out pattern sheet. 
Use an X-acto knife and/or manicure scissors to cut out the details in the owl. Once the details are cut out, use scissors to cut around the outside of the owl shape. 


For the hedgehog, you can either use the manicure scissors to cut out the eye and then cut around the outside of the hedgehog shape, OR cut out the hedgehog first and then use a 1/8” hole punch to cut out the eye.


Place one of the shapes on a piece of scrap paper. Use the paint brush to apply ModPodge to the shape (Hint- on the shape that will get dark brown glitter, apply glue to the printed side of the cardstock. For the shape that will get light green glitter, apply glue to the unprinted side of the cardstock. This will give you better coverage.) 


Quickly and carefully (before ModPodge dries), transfer shape to a clean sheet of scrap paper. Sprinkle (dump) a generous amount of glitter onto the shape. 


Wait several minutes to give ModPodge a chance to dry, then gently tap excess glitter from shape. Use the paint brush to reapply ModPodge to any spots that you missed and sprinkle with glitter. Allow to dry. (Don't forget to do the little circles for the owl's eyes).

Drill a hole in each piece of wood (for one piece, drill on the short side of the rectangle, and for the other drill on the long side.) The size of the hole needed will be determined by the size of the string or cord you are using to hang it. Sand the wood lightly.

Paint one wood piece green, and the other brown. (Don't forget to paint the sides and back.) Allow to dry, then lightly sand away some of the paint just on the edges. Remember that your brown glittered cardstock will go on the green wood, and the green glittered cardstock will go on the brown wood, so paint the pieces accordingly.


Holding the edges of the cardstock shape carefully, use a paint brush to apply ModPodge to back of cardstock (you will have to work quickly, because ModPodge dries quickly). Place cardstock on wood piece. Use brush handle to gently press edges down (this will work better than using your hands to push edges down- the handle won't remove glitter like your fingers will.) To place the owl's eyes, you may want to use tweezers. Or just drop it on and hope it goes in the right place, like I did :)


When glue is completely dry, you can use a small paint brush dipped in paint to touch up around edges and cover any glue or glitter smudges.


Allow to dry completely. Attach string for hanging.


You can also skip drilling the hole, and use them for little pieces of artwork. They look cute on a miniature easel: 


Click here for PDF of tutorial (including pattern sheet).

LinkWithin

Related Posts with Thumbnails