Showing posts with label Decorating. Show all posts

Friday, March 1, 2013

New Studio Space!!


Do you want to see the studio space I have recently "acquired"??? I love it! And the funny thing is, I didn't know how much I "needed" it until I got it all done....


Our oldest daughter got married back in June. Sad as we were to see her go... youngest daughter couldn't wait to get her hands on her older sister's old (bigger) room! We moved youngest daughter into that room.... what to do with the extra room which used to be youngest daughter's room? Expand the studio space, of course! (No brainer, right??)

Now, I will tell you a secret- for years now, I have kept most of the quilts I have made in big plastic containers in the basement, because there really wasn't another place to put them. I couldn't wait to have a room dedicated to storing and displaying all of my quilts! And also, I wanted more space for storing my bolts of fabric and for cutting fabric.

We decorated the room when my daughter was about 8 years old. It had yellow bead board and lilac wall paper. My daughter tried to talk me into painting, but I just didn't have the energy for that! I decided that the colors worked fine with my stuff- it's cheerful. Here is a photo of what it looked like when I was organizing all of my quilts.


In addition to the yellow bead board and lilac wall paper, the room also already had shelving all around (for displaying dolls). This, I discovered, was PRIME real estate for storing and displaying fat quarter bundles which are waiting to be purchased & go to their new homes, as well as many of my project samples:


I already had many of the furniture pieces in the room. The dresser is a vintage piece from my grandmother- great for storing all kinds of stuff. I had the rug, and the cedar chest. The cedar chest used to belong to oldest daughter, but it's not her style and she left it behind when she moved out. It is perfect for storing all of my wool and protecting it from moths:


 The cabinet was youngest daughter's and stayed in the room when she moved across the hall to a room with a much bigger closet (making her little armoire unnecessary.) Now I have some place to store all of those quilts that used to hide in the basement:


I did buy a couple of pieces of furniture for the room from Ikea. My favorite is this gate-leg table. You can have one side of the table up, or both, or neither, so it's really convenient. There are drawers on both sides for more storage. Plus, I think it's just really cute. It works out really well when I have lots of fabric to cut (like when I'm assembling bundle after bundle of fat quarters...)


I also got some shelves from Ikea so I have a convenient place to store my bolts of fabric, and other cute stuff:


A bonus of this room, which I didn't even realize until we got it all done, is that with 3 east and south facing windows, the light is great! So it makes a perfect little photography studio. And since I have managed to keep it pretty neat and clean so far, it also means that I don't find myself spending half an hour to find a clear surface so I can set up a photo.


Did I mention that I love my new space? I spend as much time in there as I can, because it is so bright and cheerful and uncluttered (my "main" studio space tends to get pretty messy....) Also, since my main studio is downstairs and the "annex" is upstairs, it has really increased the amount of exercise I get each day :)

To go on a "tour" of my downstairs studio, click here.

When it comes to a sewing room, studio, or other "hobby" area, what is the most important feature to you? Lighting? Storage space? Your surroundings- colorful & energizing or peaceful & inspirational? Being as close to (or as far away...) from the family as possible??

Thanks for "visiting" my new studio!

Monday, December 10, 2012

This Week's Ornament Tutorial : Patchwork Bird AND Pat Sloan's American Patchwork & Quilting Radio Show

(Wow! that was like, the longest blog post title in history, right?)


For the month of December, we will be doing a tutorial for an ornament every week. This week's ornament is a patchwork bird. It's an excellent way to make use of your scraps! If you have bags full of tiny pieces that you've been saving for someday- today is your day!

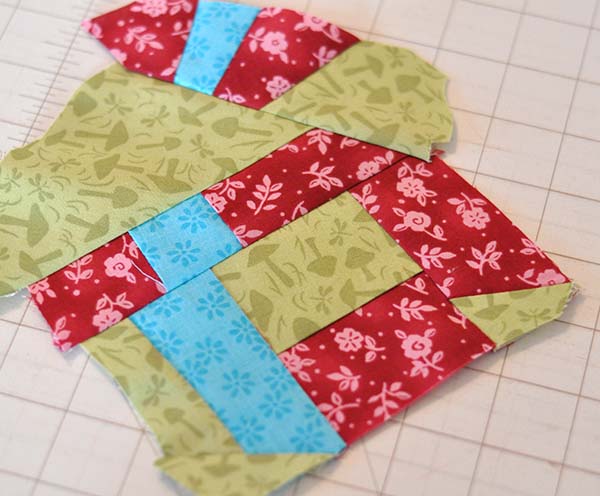
If you are short on time, there is also a plain version- you can sew up a "flock" of these in an afternoon.... You could also add lavender or a few drops of scented oil to your stuffing to make sachets. I've done "modern Christmas" colors of bright green, fuchsia  and turquoise- you can use whatever fabric scraps you have lying around (I know you've got some fabric there, somewhere... ha ha)

Supplies:
  • Scraps of fabric
  • Polyester filling/stuffing
  • 1/8" ribbon
  • Embroidery floss
  • For the eye: a tiny button, seed bead, or thread (such as embroidery thread or wool thread) to make a French knot
Print out and cut out pattern pieces (link at bottom of post).
To make the patchwork version, piece together scraps of fabric until you get a piece about 5 x 9” big.


For the bird's body: For the patchwork version, place you patchwork piece right sides together with a plain piece of fabric. For the plain bird, place 2 pieces of fabric right sides together, pin pattern to fabric. Cut out around pattern. Remove pattern piece. Pin fabric pieces together.

Sew the pieces together (still right sides together) with a 1/4" seam allowance, leaving an opening as indicated on pattern piece. Backstitch at beginning and ending of stitching.


Hint for sewing around curves- shorten your stitch length, and as you go around the curves, go slowly and stop every few stitches to lift the foot just slightly and pivot the fabric slightly.

Clip seam allowance at points of tail and beak. Make a few small notches at the curves. This will eliminate some "bulk" of the fabric and make your seams flatter when you turn it right side out.


Turn bird right side out. You can use tweezers to help pull tight areas right side out. Use a wooden skewer to gently push out the points of tail and beak. Press (press the raw edges of the opening in.)


Loosely stuff bird with polyester filling. Use a wooden skewer to push filling into head and tail. Hint: stuff bird with many small pieces of filling, instead of a few large pieces.

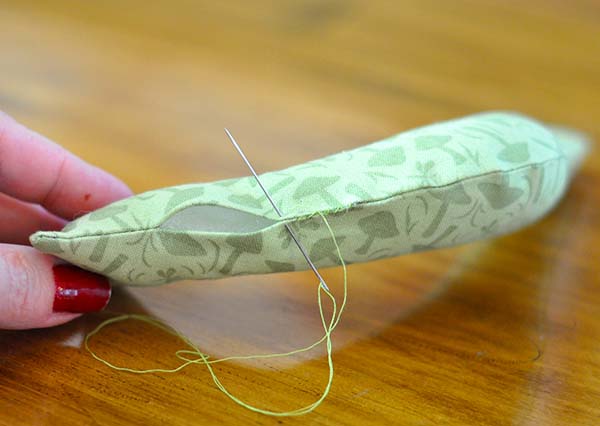
Hand stitch opening closed with matching thread. 


For wing, place 2 pieces of fabric right sides together, pin pattern to fabric and cut out. Remove pattern piece. Sew together (do not leave an opening.) Trim seam allowances.


Carefully cut a slit about 1 1/4" long into 1 side of the wing.
Turn right side out; press. Stitch opening closed and/or put a few drops of Fray Check on the raw edges. 


Use embroidery floss to stitch around edges of wing- you can do a blanket stitch, whip stitch, or make an X stitch. To make the X stitch, bring up needle through A, bring it around to the back, then bring it up through B (to the right of A). Continue making X’s.


Use matching thread to stitch wing to bird (you don’t have to stitch down the whole wing, just the top.) 


For the eye, sew on a tiny button, seed bead, or make a French knot.

Tie a bow around the neck with 1/8" wide ribbon.

Use a sewing needle to attach a 12" piece of embroidery thread to top of bird; knot to form a loop for hanging. 

  
(Here is the link to last week's ornament, Glittered Forest Friends, in case you missed it.)


What colors would you make your birds in? I think this would be a really cute project any time of year, not just during the holidays.

Oh! and don't forget I will be on Pat Sloan's American Patchwork & Quilting Show later today! I am excited, and pretty nervous- I hope I don't say anything stupid, you know??? I mean, it's one thing to say something stupid to the bank teller or the store clerk, but with so many people listening on the interwebs..... it's a bit nerve wracking!


Friday, December 7, 2012

Merry Moss: A DIY Christmas Decoration

Guest blogger Samantha has come up with an easy project for your home! I love this idea, it will add "rustic elegance" to your home. At the end of the post, I will have an announcement...


Happy December!
While I am sad to leave Fall behind, I am looking forward to the Christmas season.  It's my first Christmas as a married person (!!!!) so it's extra special for me this year.  To get myself into the spirit, I've been listening to Christmas music, doing lots of baking, and of course, making decorations!
My first decoration is actually something I've been wanting to make for a while as a permanent "non-holiday" decor item.  But once I had the Christmas music on, I was like, "Aw yeah, Christmas. Here we go."
Want to make your own? It's surprisingly simple and endlessly customizable!

Here's what you'll need:
wire, about 18 gauge (it needs to be easily bendable, but hold its shape when you add the moss)
fake moss (available in floral department of craft store)
clear fishing line
needle nose pliers

1. Form the wire into whatever word you would like it to say.  If you get it perfect, it might help to take a picture for yourself to refer back to, since you'll be bending the wire a little bit to attach the moss.
2. Cut a piece of fishing line about 18" long and tie it to the end of the word wire with a square knot. Take your first, small piece of moss and hold it against the wire. Carefully begin wrapping the wire around the moss in a spiral motion to hold it to the wire.  It should look like this:


3. Continue adding on more pieces of moss to be wrapped to the wire until your fishing line runs out.  Give yourself a little bit of extra line so that you can tie it off.  Once you have tied and clipped the fishing line, tie on another piece and continue wrapping the moss to the wire until the whole word is covered.

As I said, you could make this moss word say anything; "Christmas," "joy," "welcome," or even the name of your family.


I hope this project has gotten your holiday gears in motion, and that this rustic and whimsical decoration brings warmth into your home!

Happy weekend!
Samantha

So here is my (Jacquelynne's) announcement- in case you haven't heard yet, I will be on Pat Sloan's American Patchwork & Quilting radio show this coming Monday, December 10! Please join me- I'm sure it's going to be a lot of fun! (Can you from all of my !!!!! that I'm excited???!!!) Please tune in and tell all of your quilt-y, craft-y, sew-y friends about it.....


This weekend we are going Christmas caroling, and I'm going to try to finish putting all of my decorations up. And then, maybe some much needed down time and relaxation on Sunday afternoon. What's going on with you this weekend? Holiday decorating? Baking Christmas cookies? Maybe just catching up on laundry and other domestic necessities?? Remember to take time to do something fun....

Wednesday, December 5, 2012

This Week's Ornament Tutorial: Glittered Forest Friends


I do love my glitter. I love hedgehogs. So when I was trying to think up some ideas for ornaments, of course Glittered Hedgehogs came to mind. Why not? And I didn't want Hedgehog to be lonely, so I made him an Owl friend....

The trickiest part of this project is trying not to lose your glitter by handling too much... Handle the cardstock pieces as little as possible, and always on the edges.


Supplies:

  • White cardstock
  • 2 pieces of wood, 1/8 - 1/4" thick (such as Balsa wood), cut to 3 1/2 x 4" (for mine, I actually used some scraps of beadboard that my husband had laying on his workbench)
  • Acrylic paint in Brown (Americana Burnt Umber) and Light Green (Delta Ceramcoat Leaf Green)
  • Glitter- Brown and Light Green (Martha Stewart Brownstone and Green Agate)
  • ModPodge decopauge glue for paper
  • Scrap paper
  • X-acto knife and/or sharp small scissors
  • Small old paintbrush for applying ModPodge
  • 1/8 - 3/8" drill bit
  • #240 sandpaper
  • String or cord for hanging
  • Optional: 1/8" hole punch

Print out pattern sheet. 
Use an X-acto knife and/or manicure scissors to cut out the details in the owl. Once the details are cut out, use scissors to cut around the outside of the owl shape. 


For the hedgehog, you can either use the manicure scissors to cut out the eye and then cut around the outside of the hedgehog shape, OR cut out the hedgehog first and then use a 1/8” hole punch to cut out the eye.


Place one of the shapes on a piece of scrap paper. Use the paint brush to apply ModPodge to the shape (Hint- on the shape that will get dark brown glitter, apply glue to the printed side of the cardstock. For the shape that will get light green glitter, apply glue to the unprinted side of the cardstock. This will give you better coverage.) 


Quickly and carefully (before ModPodge dries), transfer shape to a clean sheet of scrap paper. Sprinkle (dump) a generous amount of glitter onto the shape. 


Wait several minutes to give ModPodge a chance to dry, then gently tap excess glitter from shape. Use the paint brush to reapply ModPodge to any spots that you missed and sprinkle with glitter. Allow to dry. (Don't forget to do the little circles for the owl's eyes).

Drill a hole in each piece of wood (for one piece, drill on the short side of the rectangle, and for the other drill on the long side.) The size of the hole needed will be determined by the size of the string or cord you are using to hang it. Sand the wood lightly.

Paint one wood piece green, and the other brown. (Don't forget to paint the sides and back.) Allow to dry, then lightly sand away some of the paint just on the edges. Remember that your brown glittered cardstock will go on the green wood, and the green glittered cardstock will go on the brown wood, so paint the pieces accordingly.


Holding the edges of the cardstock shape carefully, use a paint brush to apply ModPodge to back of cardstock (you will have to work quickly, because ModPodge dries quickly). Place cardstock on wood piece. Use brush handle to gently press edges down (this will work better than using your hands to push edges down- the handle won't remove glitter like your fingers will.) To place the owl's eyes, you may want to use tweezers. Or just drop it on and hope it goes in the right place, like I did :)


When glue is completely dry, you can use a small paint brush dipped in paint to touch up around edges and cover any glue or glitter smudges.


Allow to dry completely. Attach string for hanging.


You can also skip drilling the hole, and use them for little pieces of artwork. They look cute on a miniature easel: 


Click here for PDF of tutorial (including pattern sheet).

LinkWithin

Related Posts with Thumbnails